Jon Almeda
|
|
|
|
PREPARE |
Preparing the Clay |
|
In the past, artists would dig clay out of the earth in order to have good clay to work with. Today we buy clay from a distributor of art supplies. When we get clay out of the bag it is ready to use. Anything you do to the clay will begin to breakdown its plasticity. Be sure to keep your clay in good consistency and workability throughout the semester. You should aim to keep all your clay in good plasticity by keeping it well wrapped and heavy plastic bags.
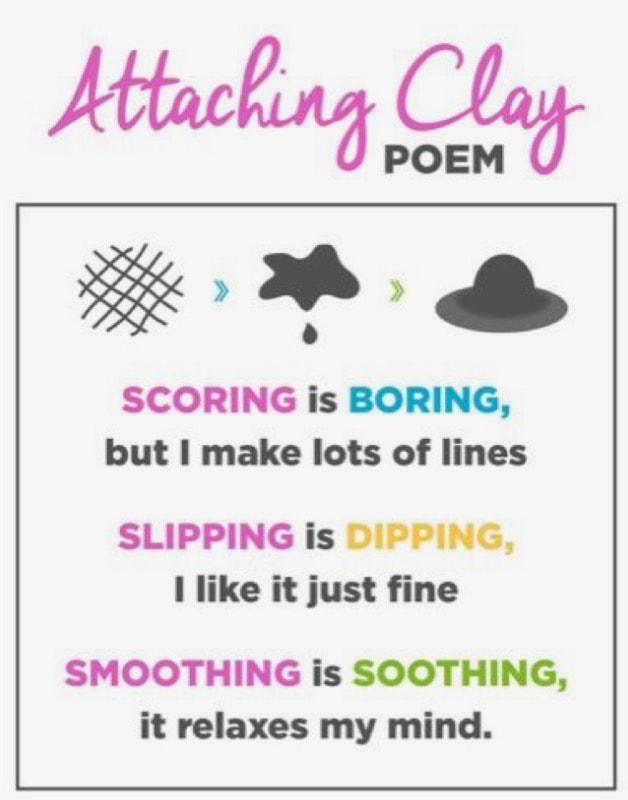
If you need to reprocess or wedge your clay, you will need to infuse moisture back into it. You are responsible for understanding and practicing the process of wedging. |
|
Types of Clay1) Earthenware- Most common and great for throwing
2) Bone China- Difficult to work with and used for casting 3) Stoneware- Great for throwing and hand building 4) Porcelain- Whitest clay 5) Dark Stoneware- Red clay mixed with black stain |
|
|
|
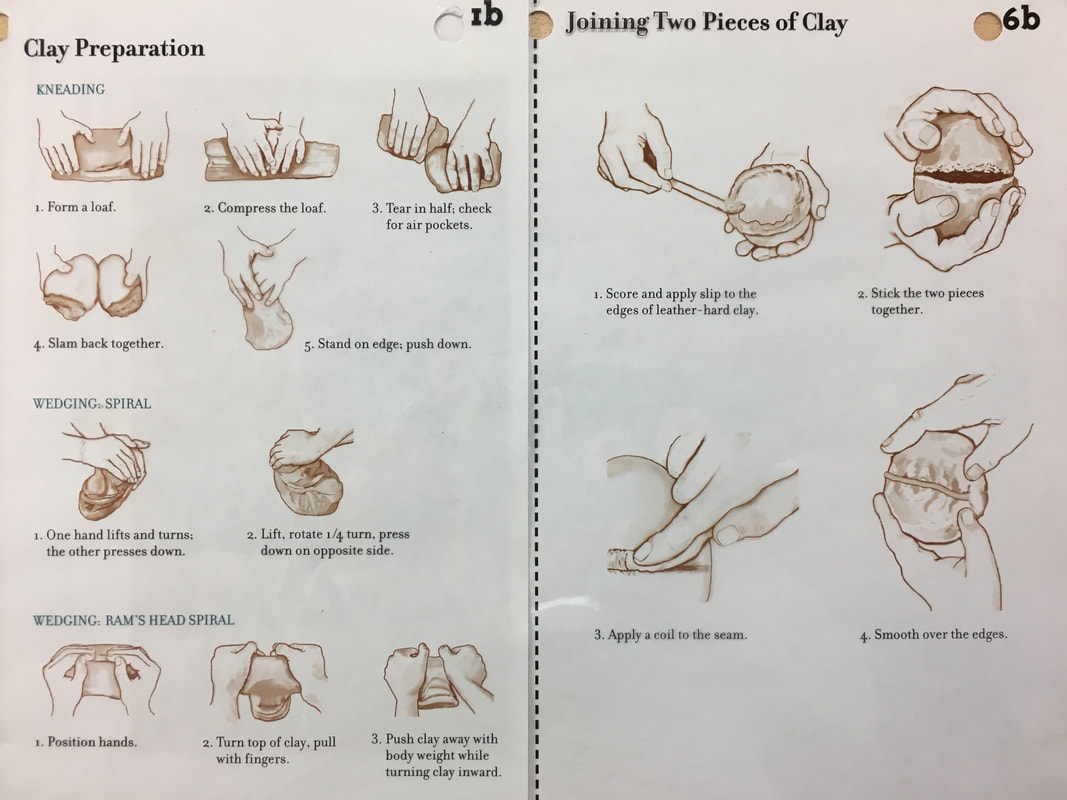
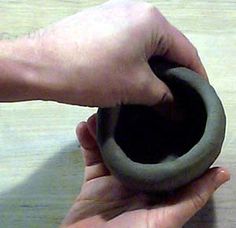
Wedging ClayWedging mixes the soft and hard spots in the clay and makes it easier to use. Clay that has been recycled needs to be wedged. To wedge you push and roll the clay toward you like in the video. There are other methods of wedging clay in the book or online. If your clay dries out, it can be infused with water, then wedged back to plasticity.
|
|
|
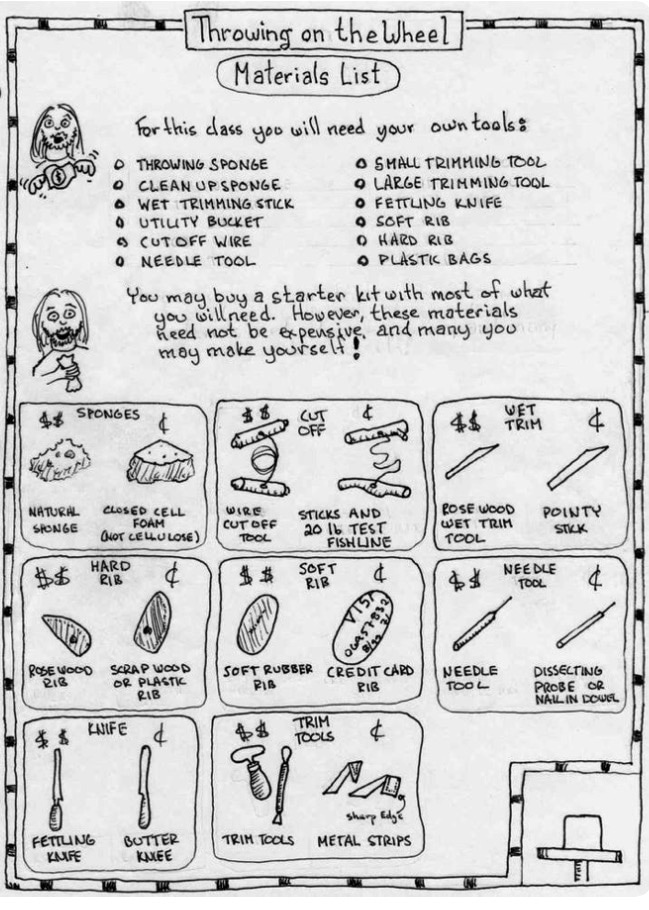
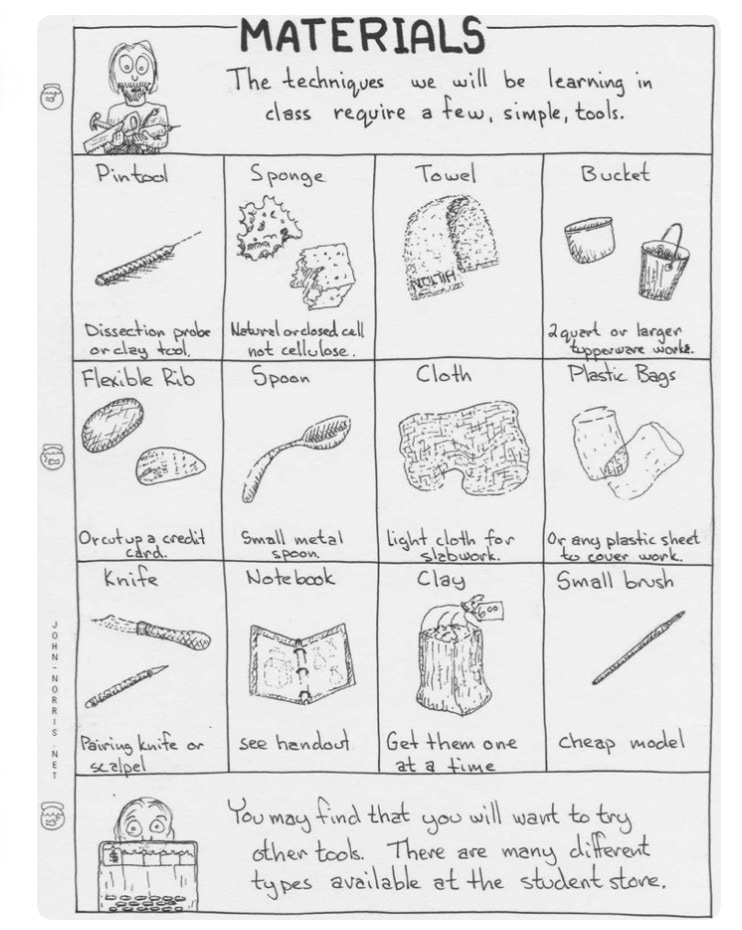
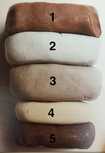
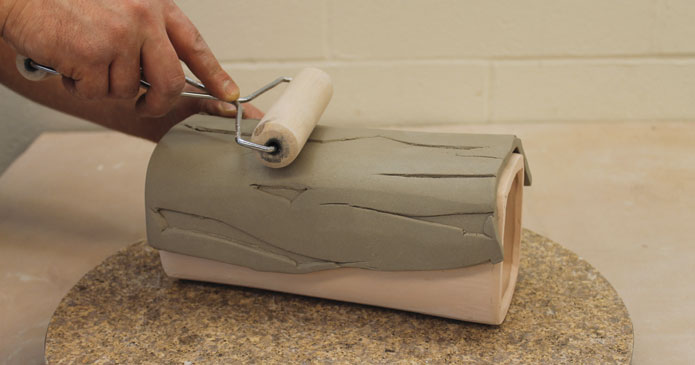
Clay Tools(1) Loop tool - remove/ pull clay
(2) Ribbon tool - cut, slice and shape (3) Needle/ pin tool -cut clay strips/ depth-holes, or place objects (4) Modeling Wooden tool - cut, smooth, contour and decorate (5) Potters Wooden Rib - shape and smooth (mostly on wheel) (6) other RIBS
(8) Wire cutter - slice clay or trim pots and other objects |
|
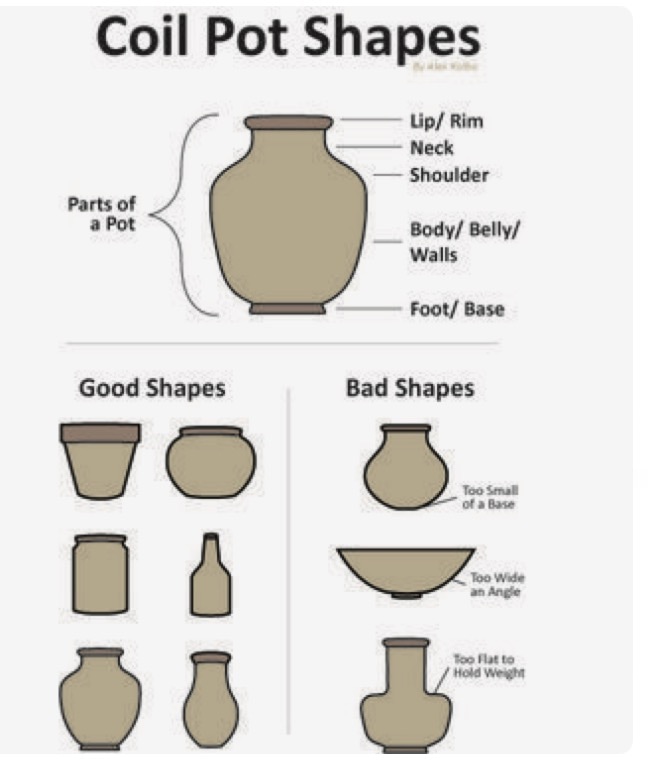
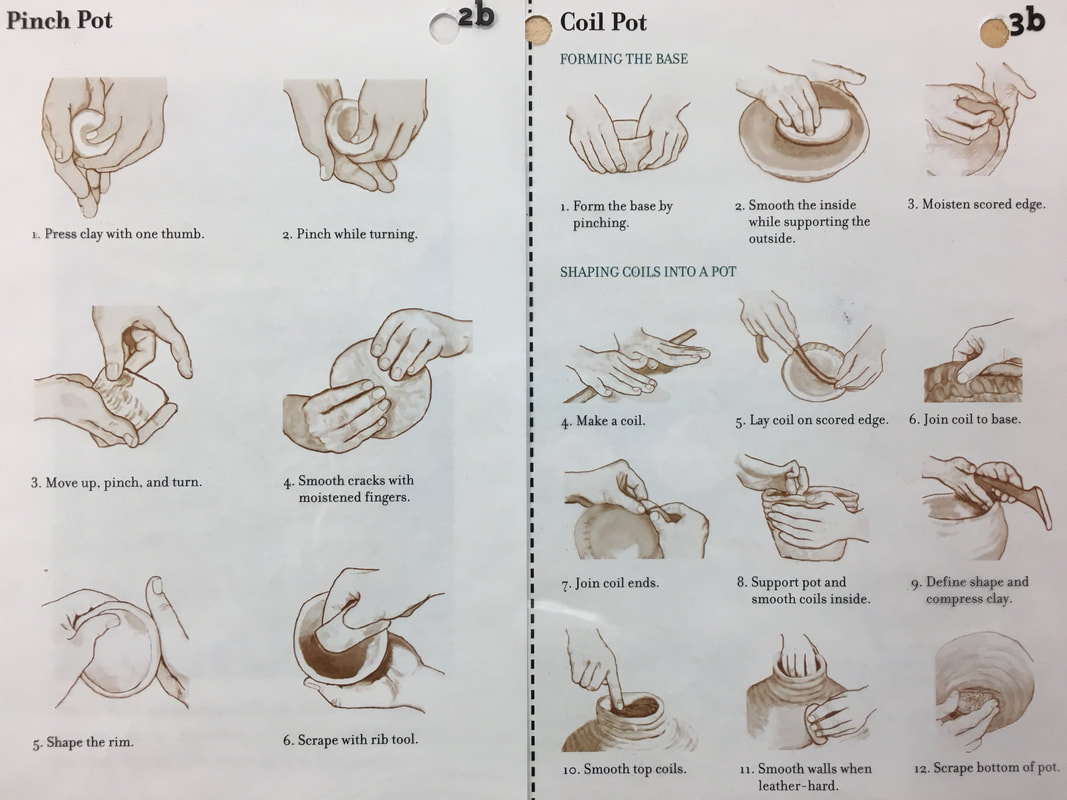
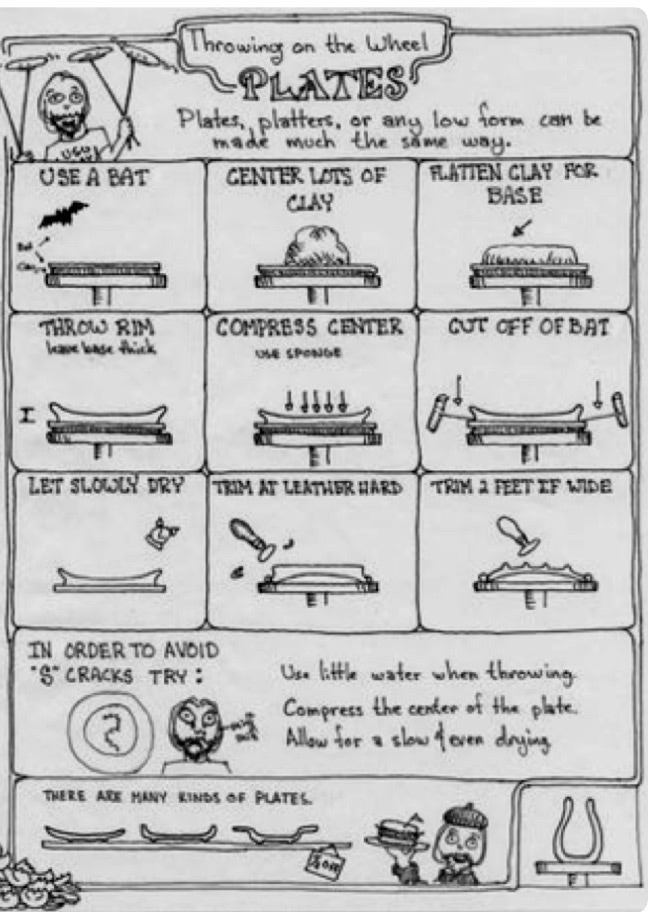
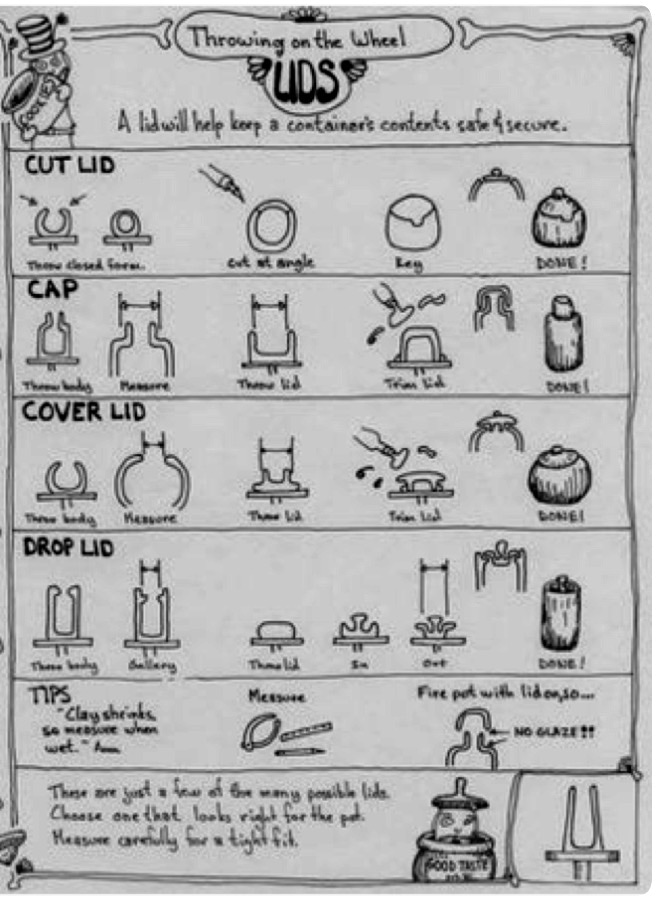
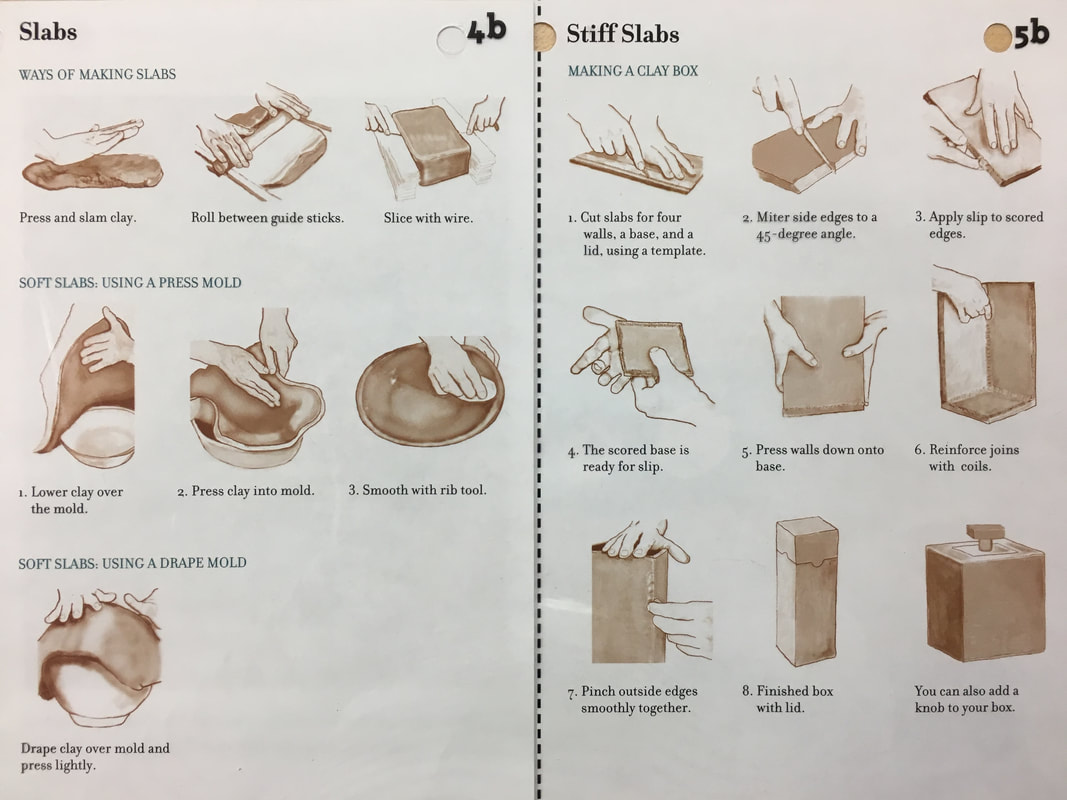
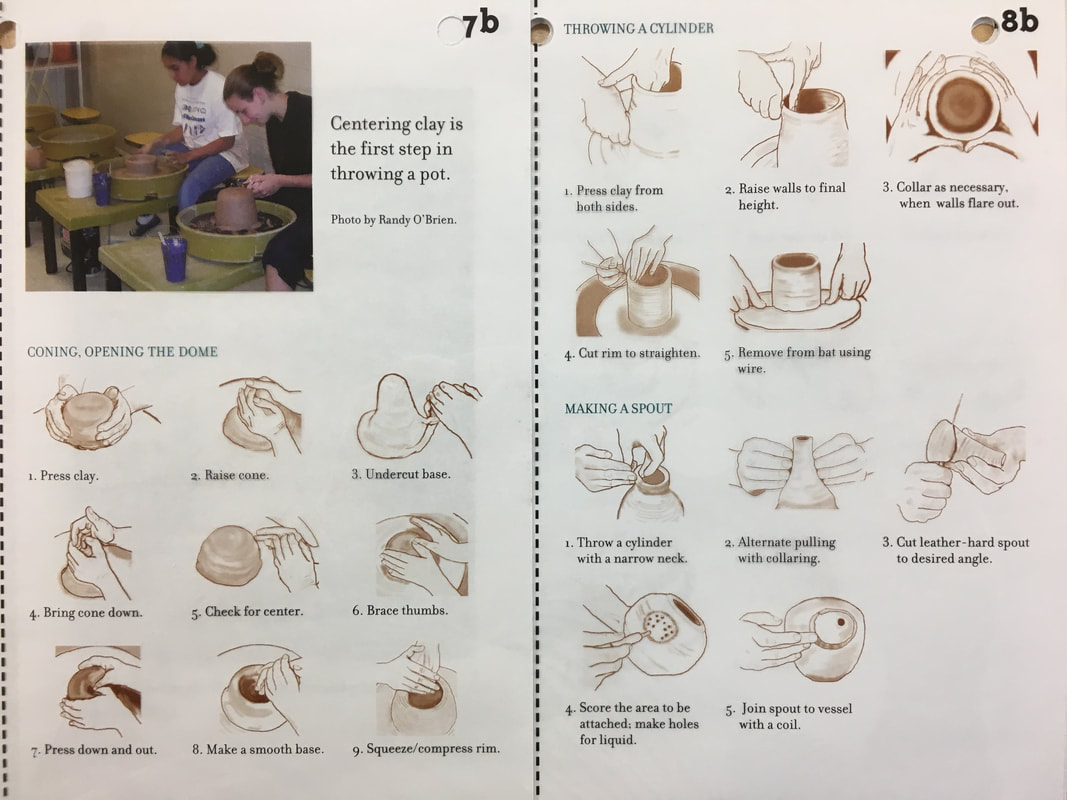
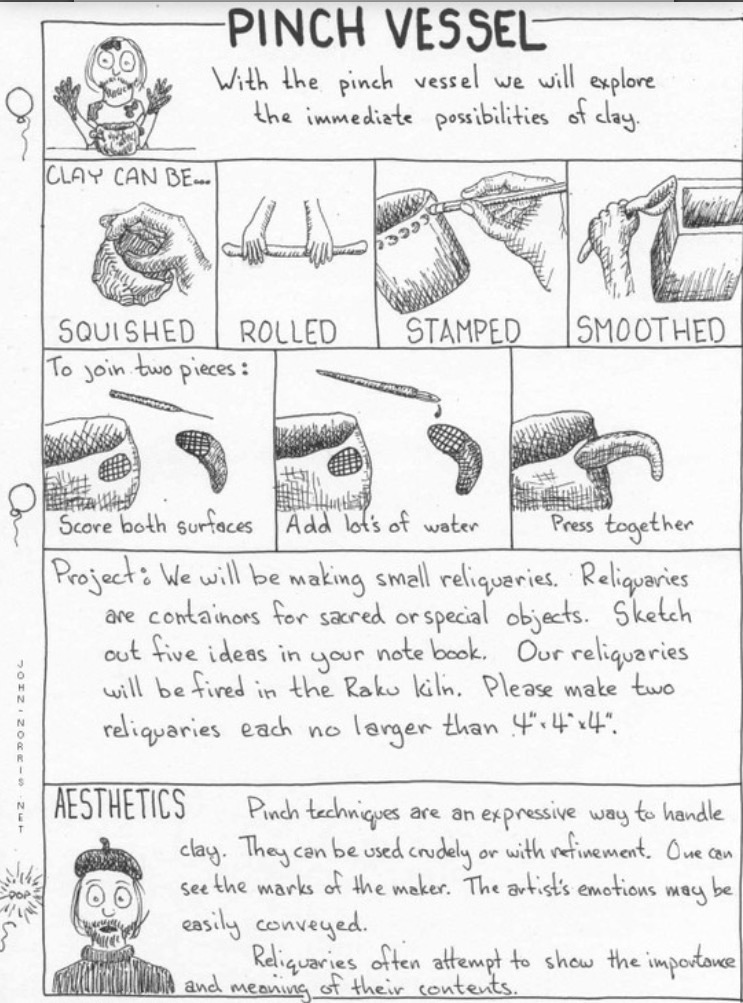
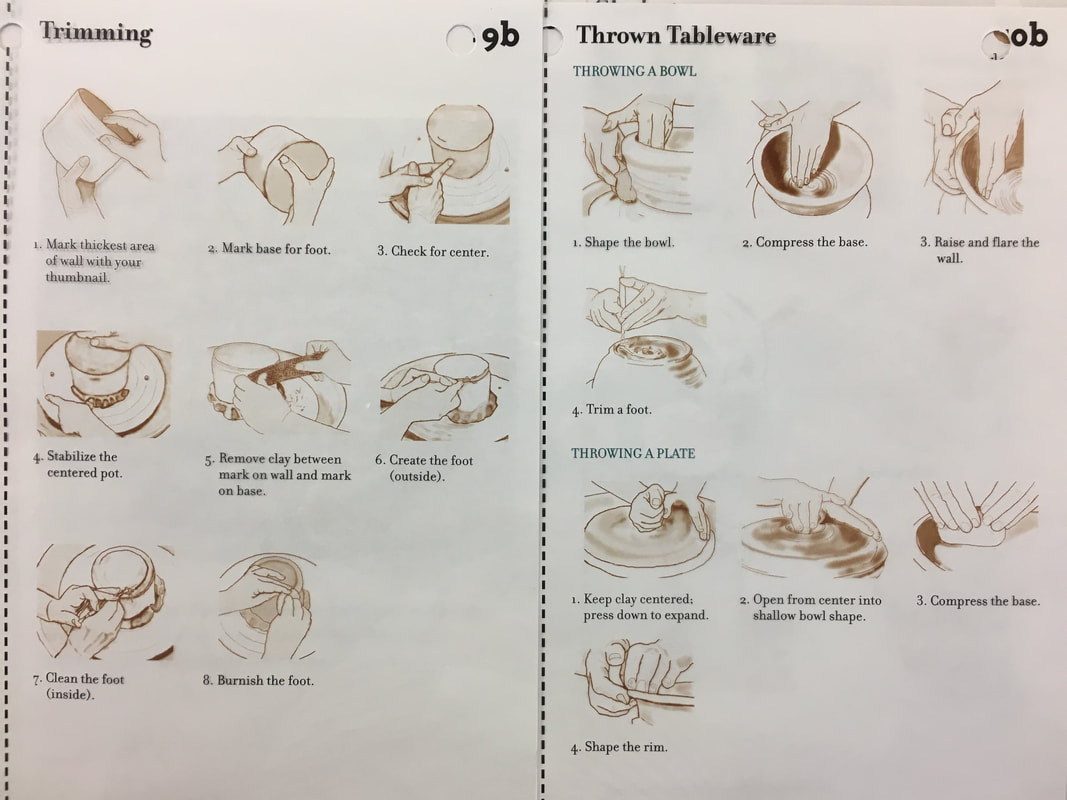
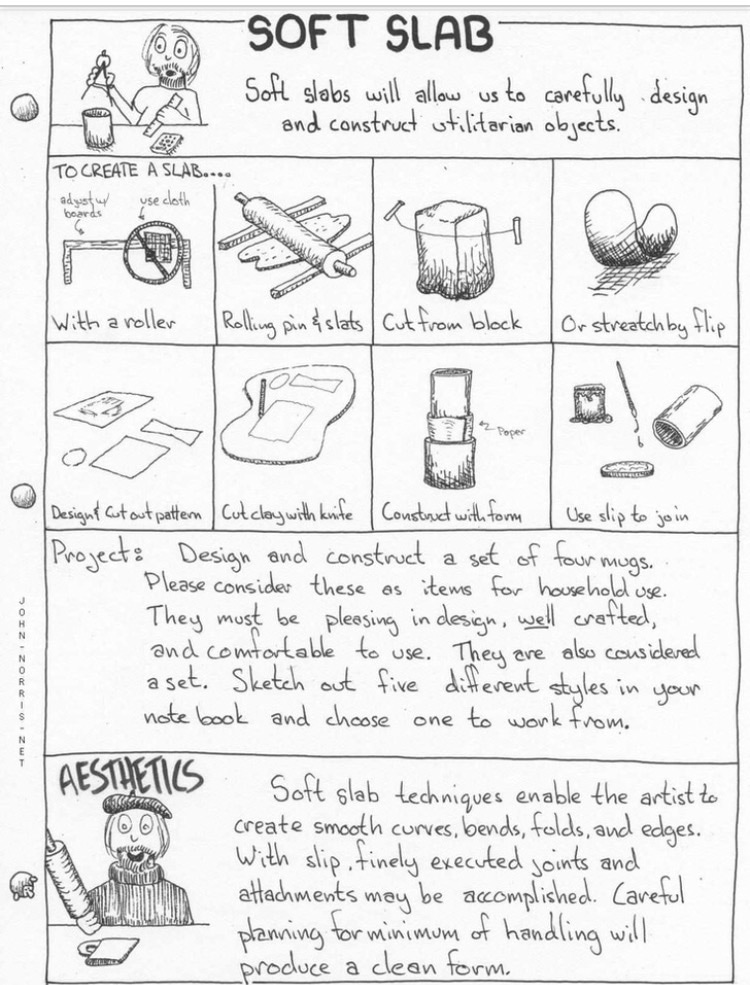
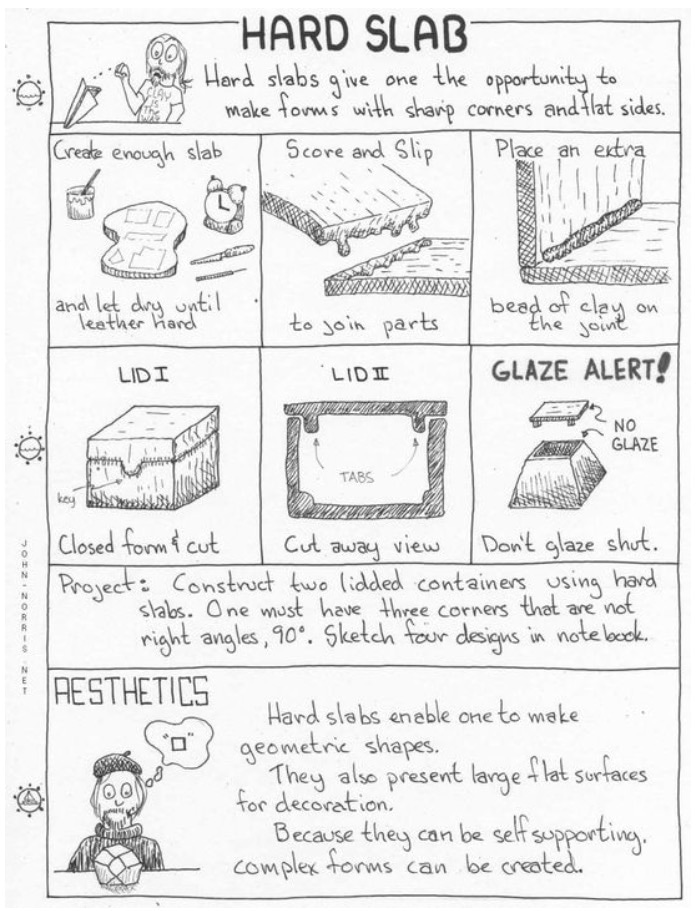
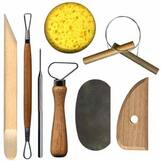
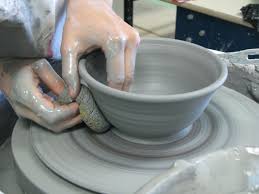
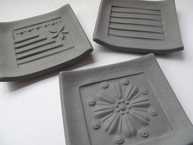
Forming ClayTo create pottery or sculpture out of clay we use many techniques, but the basic ways of building are pinching, coiling, slab construction, and throwing on the wheel. We will be handbuilding at least 4 of 6 pieces, one of each hand construction. You may choose to investigate throwing on the wheel as one of your last 2 pieces towards the end of the semester. Pottery can be made by using one of these techniques or a combination of them.
|
|
|
|
|
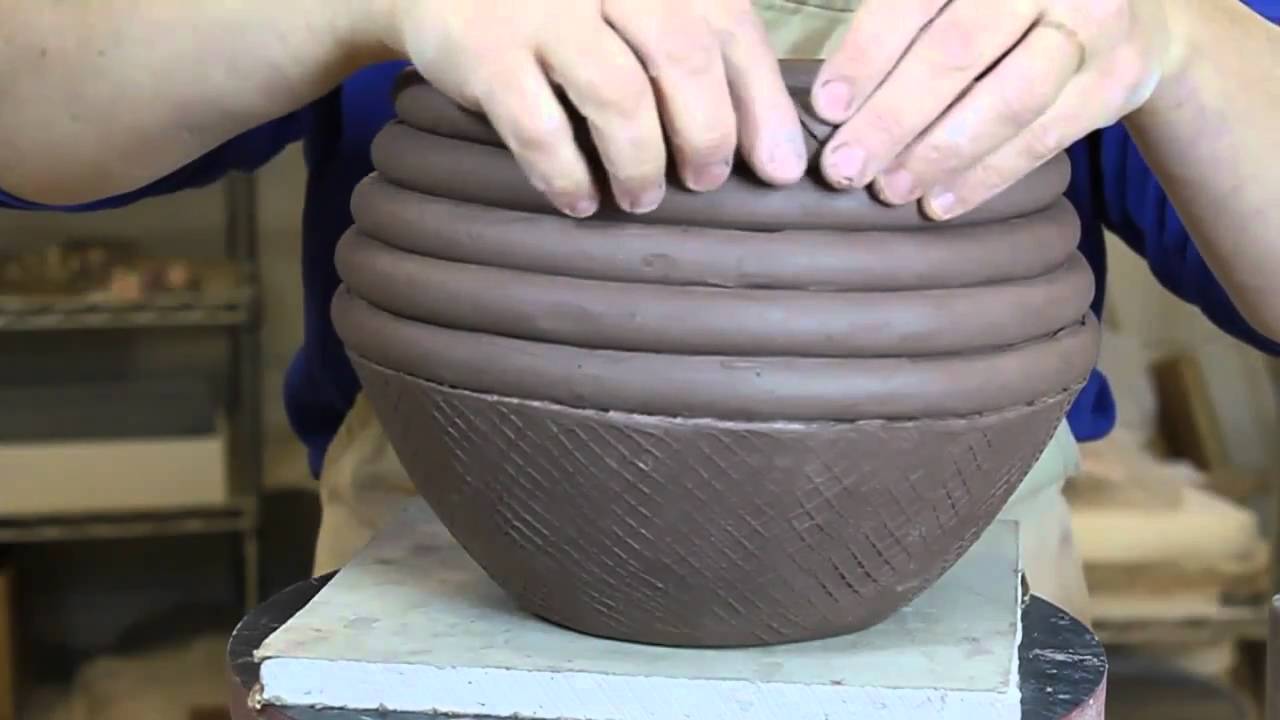
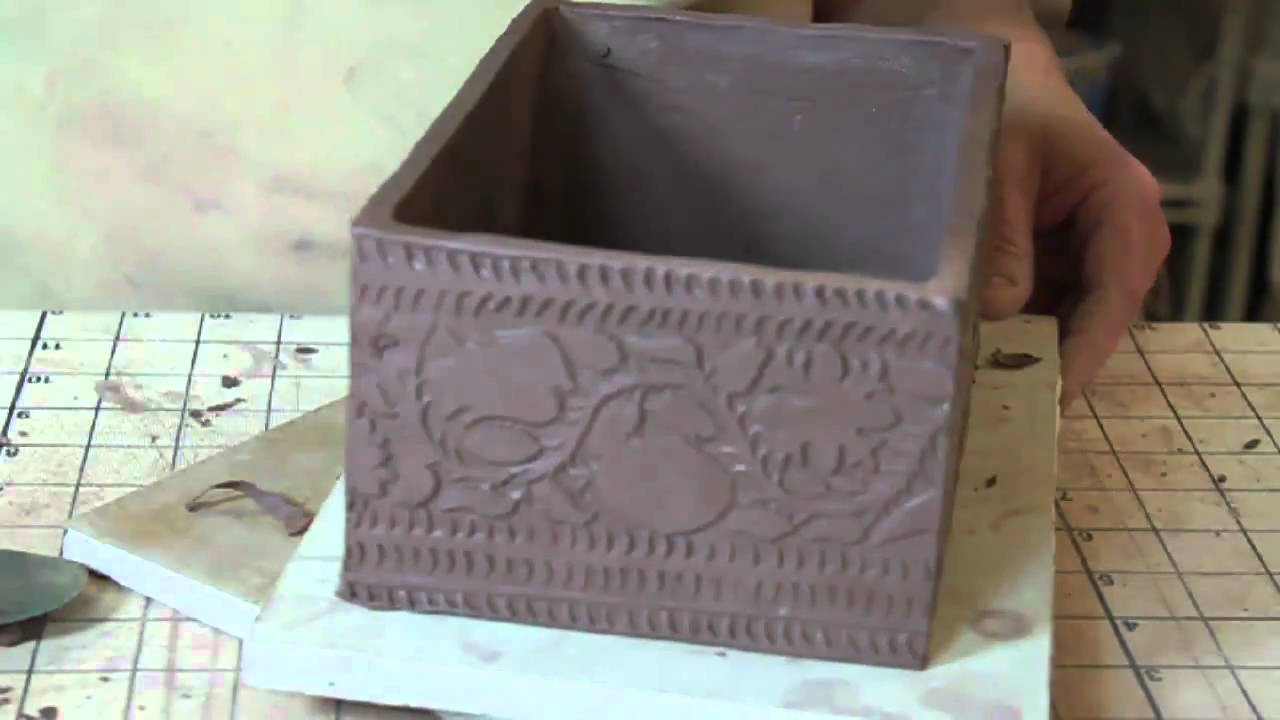
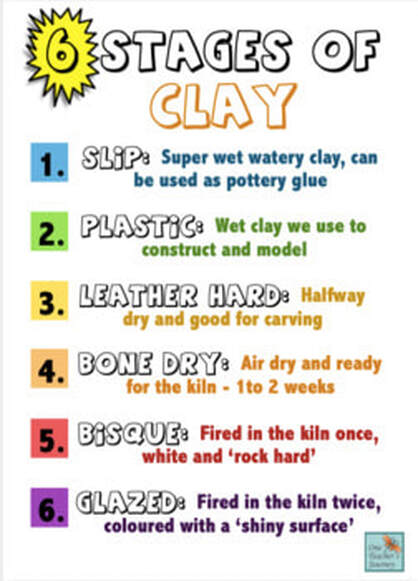
Stages of Clay
|
|
|
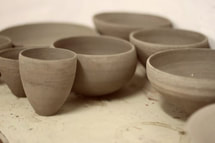
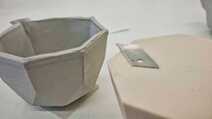
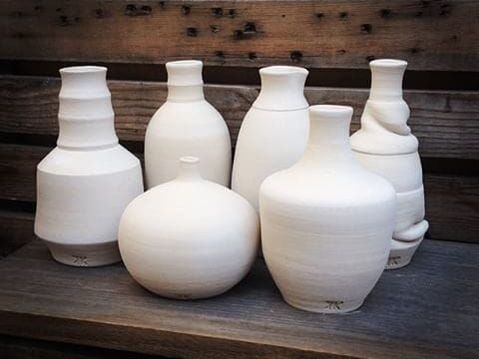
GREENWARE
|
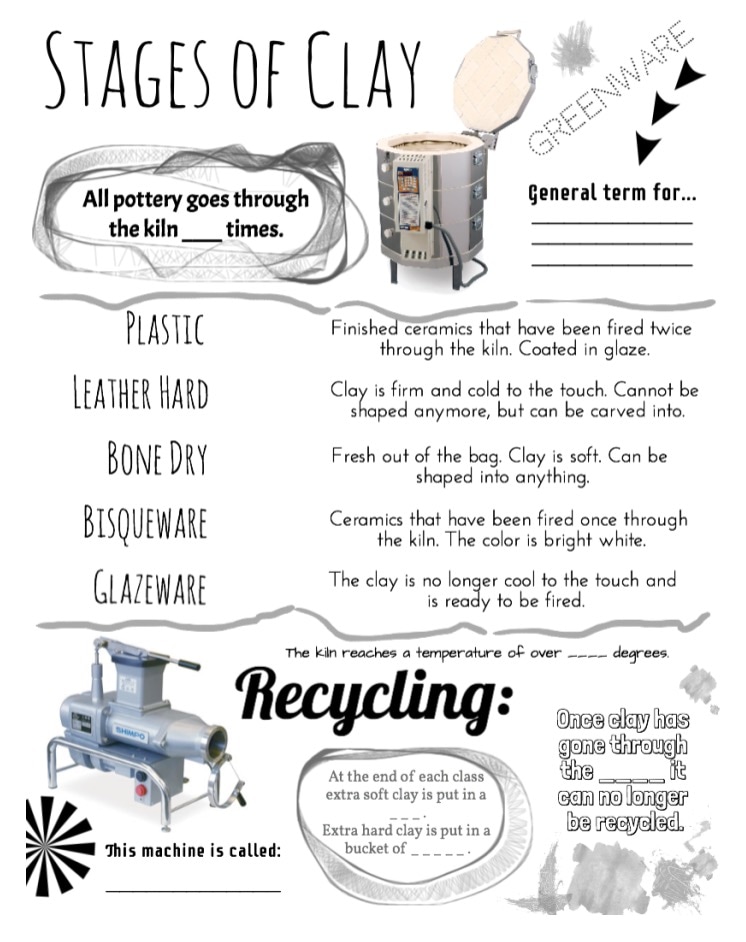
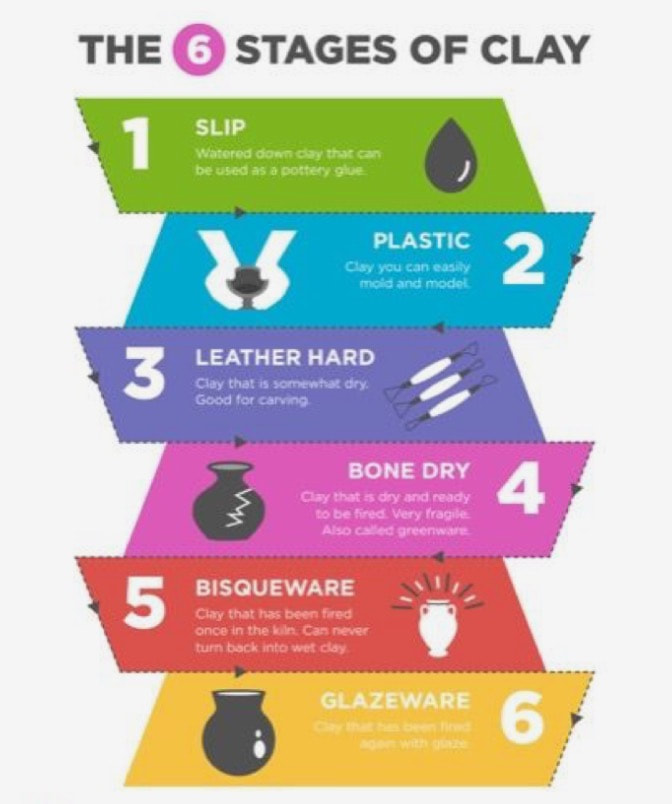
Plastic ClayPlasticity is the quality of clay that allows it to be manipulated and still maintain its shape without cracking. Clay that has plasticity should be connected to more plastic clay with or without slip.
*Be sure to keep your 'plastic' clay covered with a damp paper towel and in a closed plastic bag or it will dry. **Once your work is finished. Scribe your initials on the bottom of your piece with a pen or dull pencil and Place on the Greenware shelf (to reach bone-dry status and to be bisque fired). |
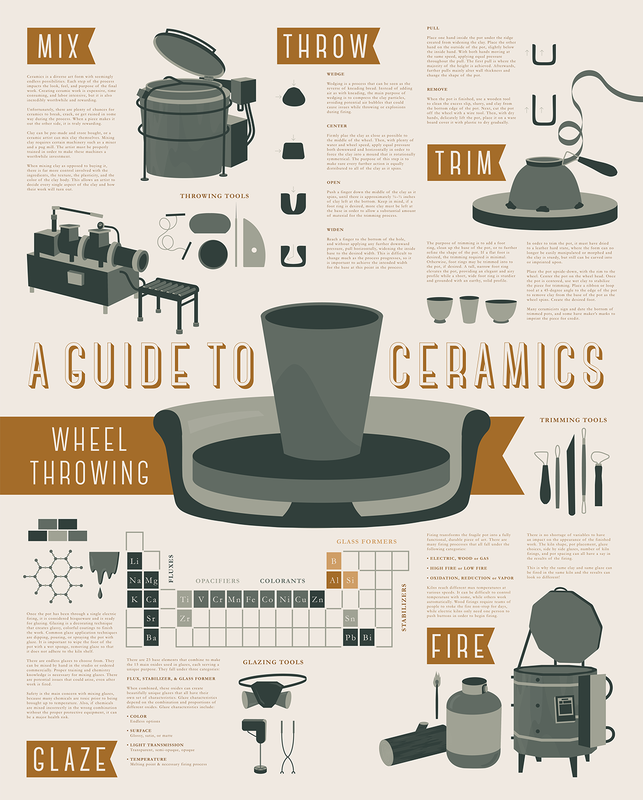
Leather-hard ClayLeather-hard refers to a specific stage during the drying of a pot or other clay object. At this stage, the clay is still visibly damp (usually a darkish gray) but has dried enough to be able to be handled without deformation. Leather hard clay will not bend as well as fresh plastic clay but is easier to get smooth and apply your finishing touches. There are some techniques that work best when clay is leather-hard.
*You can suspend this stage by keeping your piece in an airtight plastic bag. If you do not, it will continue to the Bone-dry stage. |
|
|
Bone-dry ClayWhen your ceramic work has lost all of its moisture it is considered Bone Dry. Bone dry is the last state of clay before it is Bisqueware. Bone dry clay cannot be combined with wet clay because they will not stick together. Greenware is fragile. To move to the next step, Bisqueware, it must be placed on the Greenward shelf and become bone-dry.
**Be sure to scribe your name into your piece before placing on the Greenware shelf. |
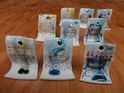
BISQUEWARE
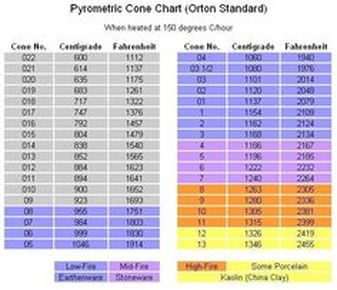
Bisque FireWhen your pieces are fired in the kiln for the first time it is called a bisque fire. Bisque firing refers to the first time newly shaped clay pots, or greenware, go through high-temperature heating or to about 1800 degrees. It is done to vitrify, which means, "to turn it glasslike," to a point that the pottery can have a glaze adhere to the surface.
Bone-dry greenware must be loaded into the kiln with a great deal of care. The kiln is closed and heating slowly begins. A slow temperature rise is critical. During the beginning of the bisque firing, the last of the atmospheric water is driven out of the clay. If it is heated too quickly, the water turns into steam while inside the clay body, which can cause the clay to burst. This process will harden your pieces so that they are less fragile and will not dissolve in water. Your pieces will also be porous which will allow the glazes to stick when applying them to the surface of your piece. As the ware goes through this process the clay will shrink. Consider creating a shrink rate ruler to determine the shrink rate % of clay. |
|
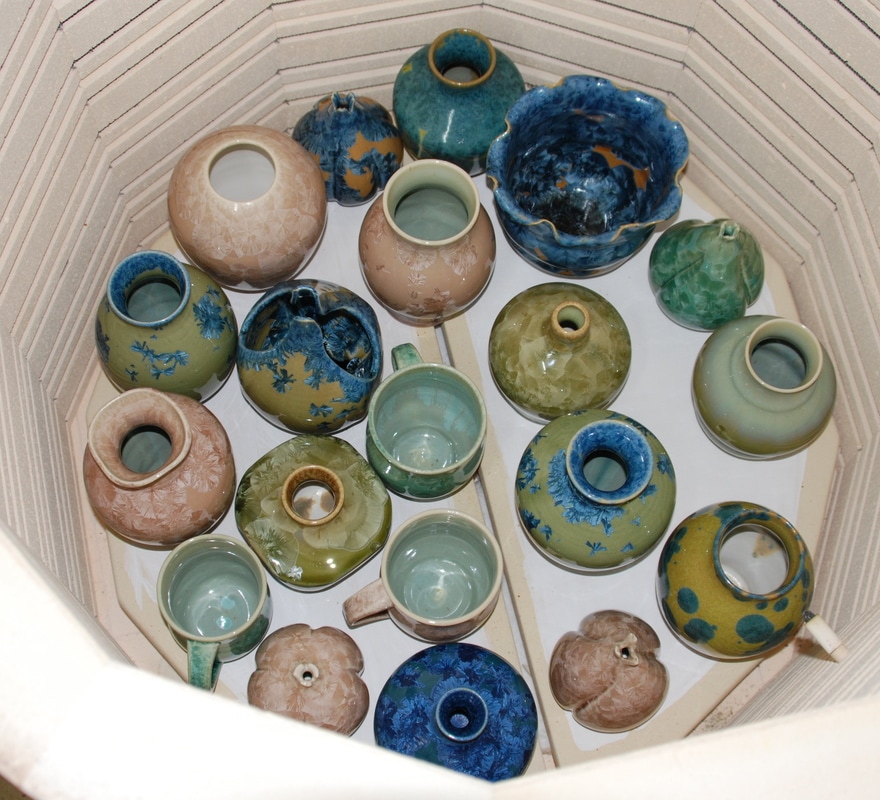
CERAMIC WARE
|
|
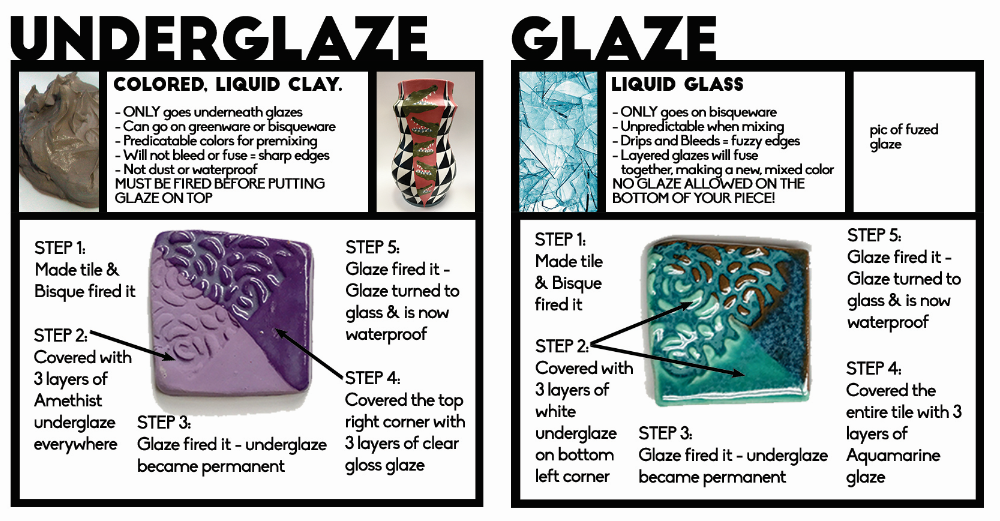
Test Tiles
|
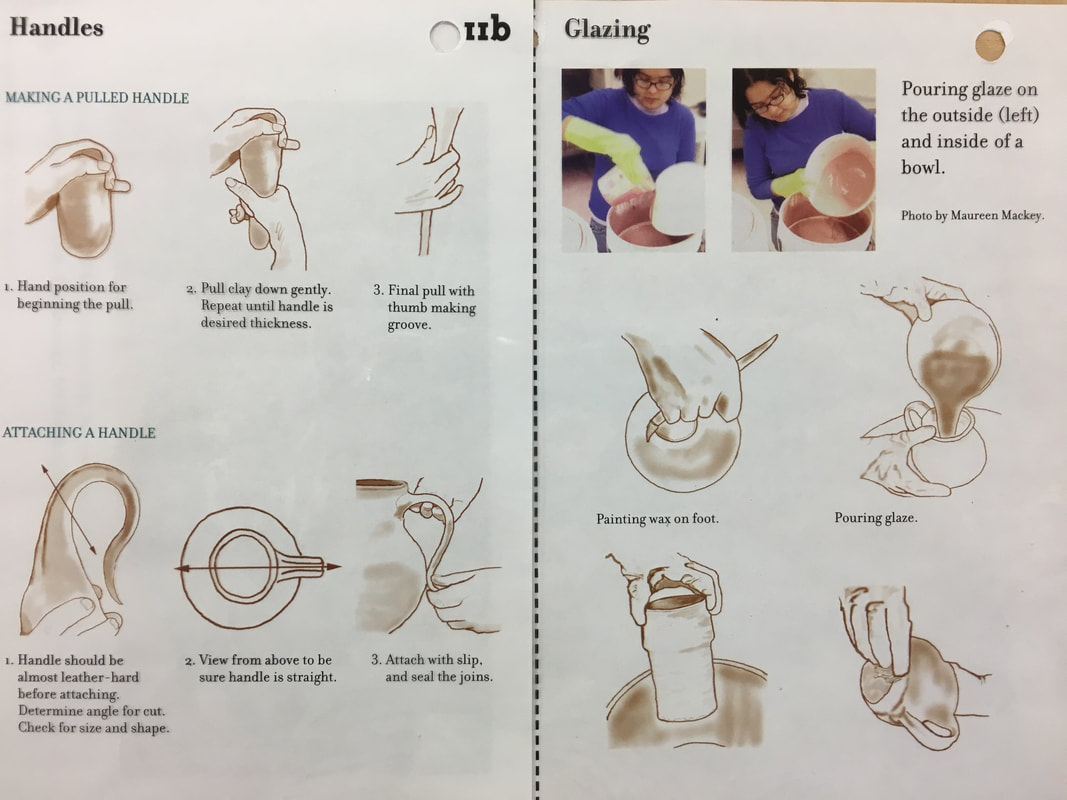
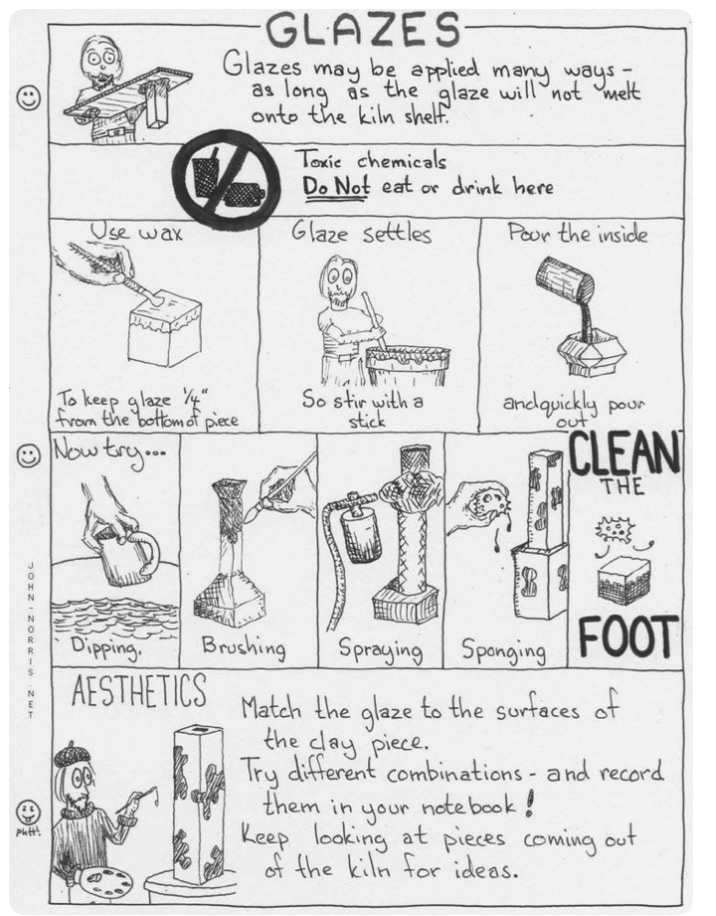
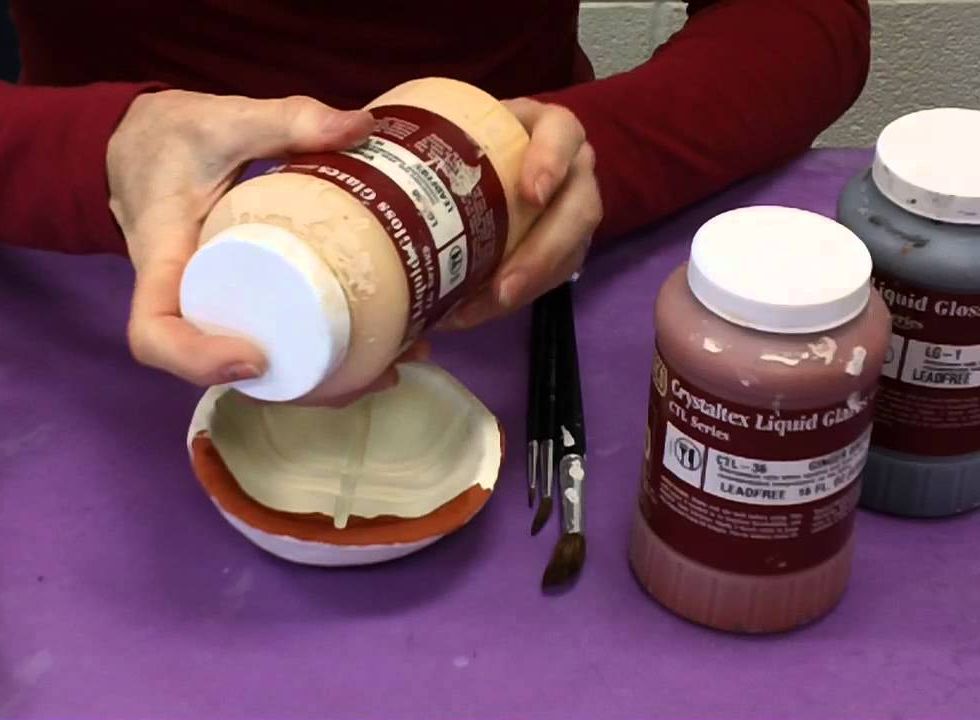
Glazing your piece
|
|
***Your piece will NEED a COMPLETED GLAZE FIRE KILN TICKET.
Glaze FireYour pieces up to about 2300 degrees which will turn the glaze into glass and will “vitrify” your pieces. Vitrify is the process of turning ceramics into a stone-like non porous state by using heat. Once out of the glaze firing there is little we can do to change the appearance of your piece.
|
|